
1. Understanding CRM Analytics Connections
- Connections in CRM Analytics serve as the bridge between your Salesforce org and external data sources.
- These connections allow you to import data from external databases, cloud services (like AWS, Google Cloud, etc.), and other CRM platforms into Salesforce CRM Analytics.
2. Prerequisites
- Access Permissions: Ensure that you have the necessary permissions in Salesforce to create and manage connections in CRM Analytics.
- Source Credentials: Have the required credentials (username, password, API keys, etc.) for the external data source you want to connect to.
- Data Source Information: Understand the schema and format of the data in the external source.
3. Detailed Guide to Establishing a New Connection
Step 1: Navigate to CRM Analytics
- Log in to your Salesforce account.
- Go to the App Launcher (the grid icon in the top-left corner) and search for “CRM Analytics” or “Analytics Studio.”
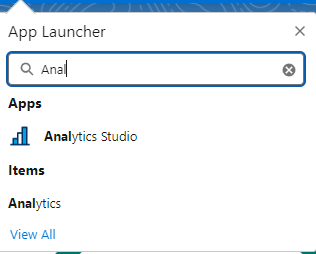
- Open CRM Analytics.

Step 2: Access the Data Manager
- In CRM Analytics, click on the gear icon (Setup) and select Data Manager.

- In the Data Manager, go to the Connect tab.
Step 3: Create a New Connection
- Go to the “Connections” tab and then choose”New Connection.”
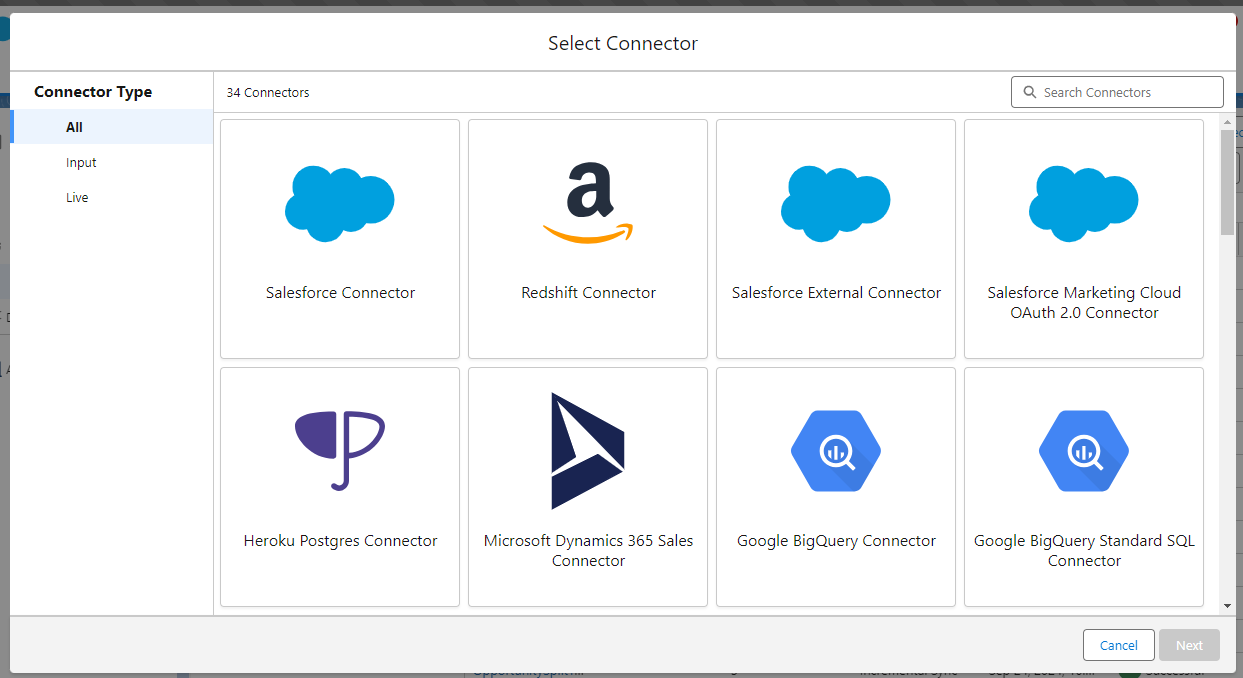
- You’ll be presented with a list of available connectors. Salesforce supports a wide range of connectors, including databases (SQL Server, Oracle, etc.), cloud platforms (AWS, Google Cloud), and other applications.
- Pick the connector that aligns with your data source.
Step 4: Configure the Connection
- Name Your Connection: Give your connection a meaningful name, especially if you plan to create multiple connections.

- Connection Details: Enter the required details for your selected connector. This usually includes server address, database name, username, password, and other relevant information.
- Test the Connection: Once the details are filled in, click Test Connection to ensure that CRM Analytics can successfully connect to the data source.
Step 5: Save the Connection
- After successfully testing the connection, click Save to create the connection.
- Your new connection will now appear in the list of connections in the Data Manager.
Step 6: Use the Connection
- With the connection established, you can now start importing data from the external source into CRM Analytics.
- Go to the Dataflows & Recipes tab to create dataflows or recipes that utilize your new connection to pull in data.
4. Best Practices
- Security: Always ensure that the credentials used for the connection have the minimum required permissions.
- Data Governance: Regularly review and audit your connections to ensure they are still needed and secure.
- Enhance Performance: Schedule data imports during non-peak times to minimize the strain on system resources.
5. Troubleshooting Tips
- If the connection test fails, double-check the credentials and network settings.
- Ensure that any firewalls or security groups allow traffic between Salesforce and the external data source.
- Review the logs in the Data Manager for any error messages that can help diagnose the issue.
Conclusion
Creating new connections in CRM Analytics is a straightforward process that significantly enhances the capabilities of your Salesforce environment by enabling the integration of external data. By following the steps outlined above and adhering to best practices, you can ensure a seamless and secure connection setup that supports your organization’s analytics needs.