Introduction
Salesforce is set to offer a new feature called DevOps,designed to streamline project deployments.DevOps Salesforce is a comprehensive approach that combines the principles of Development (Dev) and Operations (Ops) to streamline and enhance the process of software development and deployment within the Salesforce ecosystem. It aims to bridge the gaps between developers, administrators, and operations teams, enabling them to collaborate more effectively, accelerate project deliveries, and ensure a smooth and reliable software release cycle.
Steps
1. Enable DevOps
As always enabling a feature in salesforce is easy. Just click Setup→DevOps Center and Click Enable. Screenshot below,
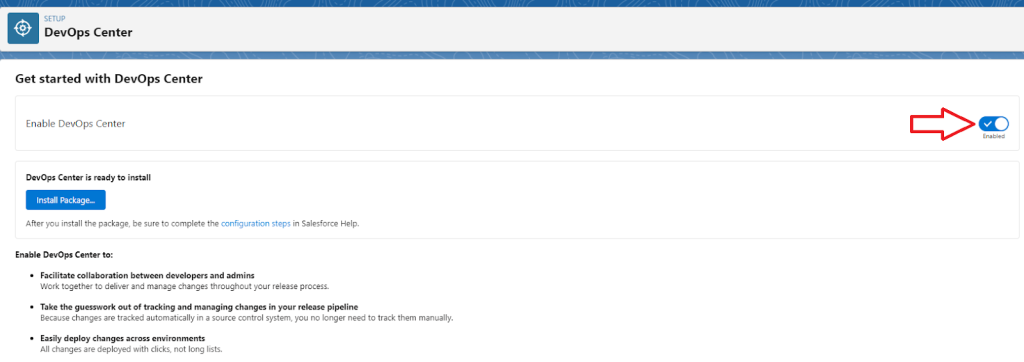
2. Install the package
Click on the ‘Install Package’ button in the below screenshot to install the app in the salesforce org.
After you install the package, be sure to complete the configuration steps in Salesforce Help.
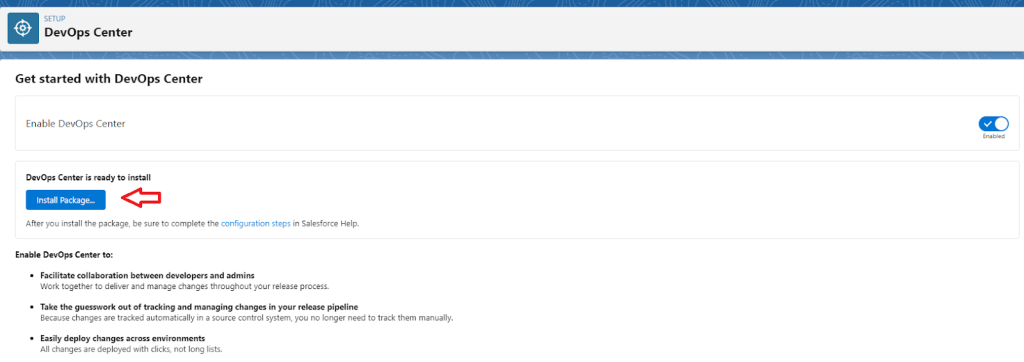
3. Create Connected App
The connected app provides access to DevOps Center in the App Launcher. The app appears in App Launcher after users are assigned the appropriate DevOps Center permission sets.
- From Setup, enter App Manager in the Quick Find box, then select App Manager.
- Click New Connected App.
- In Basic Information:
- Connected App Name: DevOps Center
- API Name: DevOps_Center
- Contact Email: [email protected]
- Logo Image URL: https://tinyurl.com/doc-icon
- Description: Manage your development and release processes
- In Web App Settings, enter the Start URL: /sf_devops/DevOpsCenter.app
- Click Save.

6. In Manage Connected Apps, click Manage.
7. In the Permissions Sets section, click Manage Permission Sets.
8. Select sf_devops_NamedCredentials, then click Save.

4. Access DevOps
Click on the App Launcher and Select DevOpsCenter which will re-direct you to the DevOpsCenter.
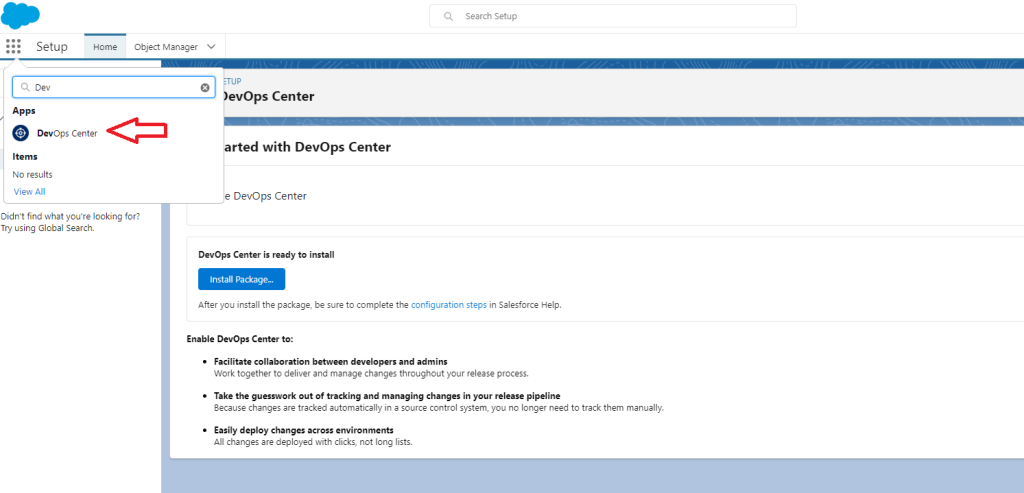
5. Create a Project
Click on the ‘New Project’ button to create a new project.

6. Connect Environment
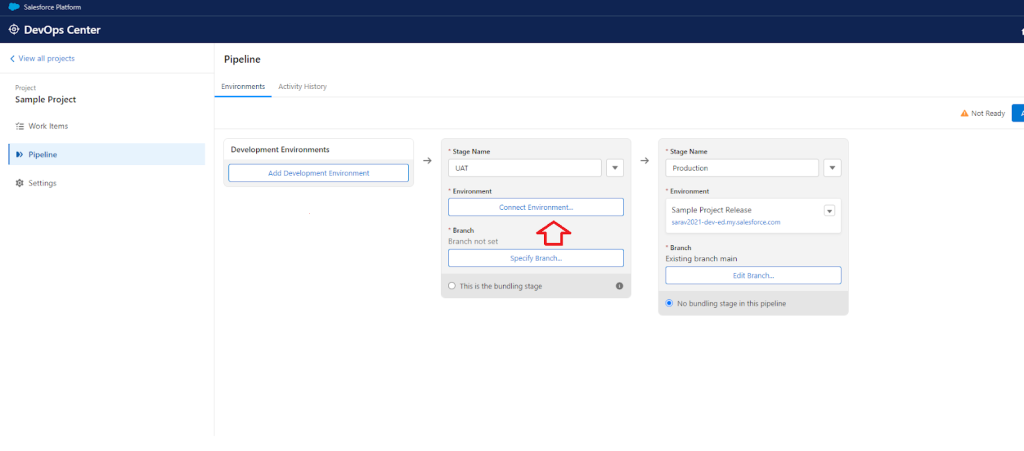
Click the ‘Add Development Environment’ button to connect the sandbox which should be a sandbox. The Dev Ops do not support Developer Edition so please make sure to create a sandbox and then connect it.
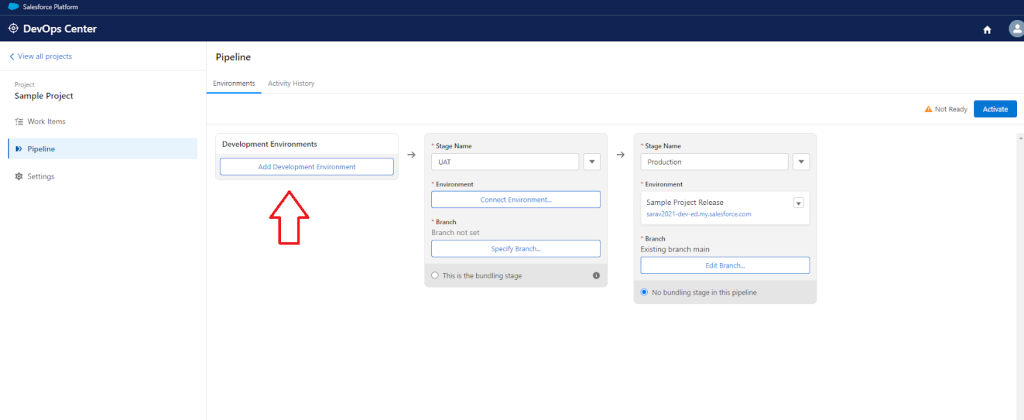
Click on the ‘Connect Environment’ button to connect the production environment. You can have a number of environments like Dev, UAT & QA sandbox and then finally deploy them to production.
7. Create Work Items
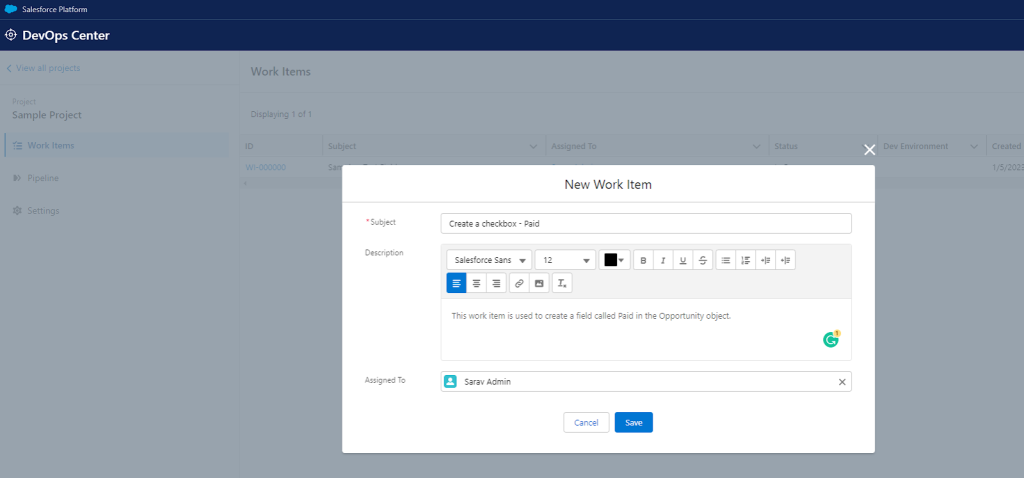
Click on the tab Work Items →‘New Work Item’ to create a work item and assign it with a ower. As an example I created an work item called create a checkbox called ‘Paid’.Once you have created the checkbox in the source system you can then pull that metadata into this work item by adding the component manually.
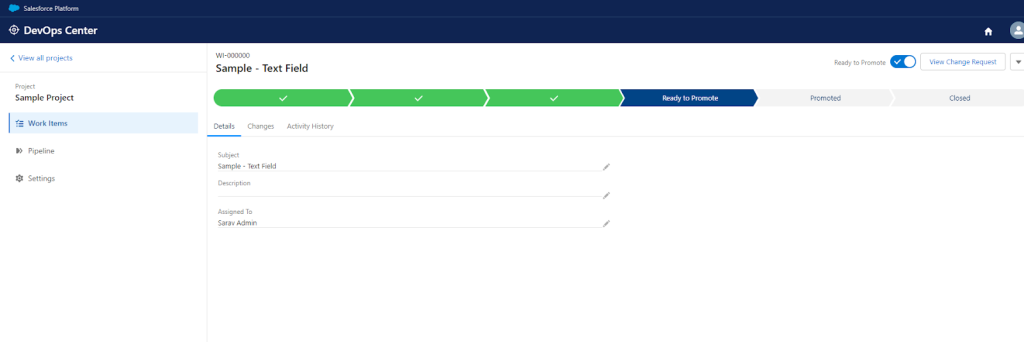
Once the component is added to the Work Item change the Status to In Review and once the Work Item is approved the field is ready to promote.
8. Promote the changes
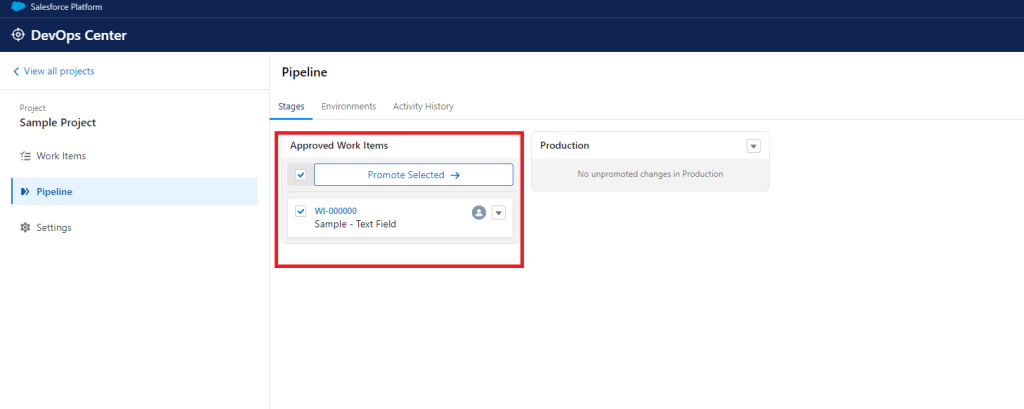
Click on the Pipeline and then select the Approved Work Item which can be deployed into production and click the ‘Promote Selected’ button to push the changes into production.
9. Complete Overview Work Item
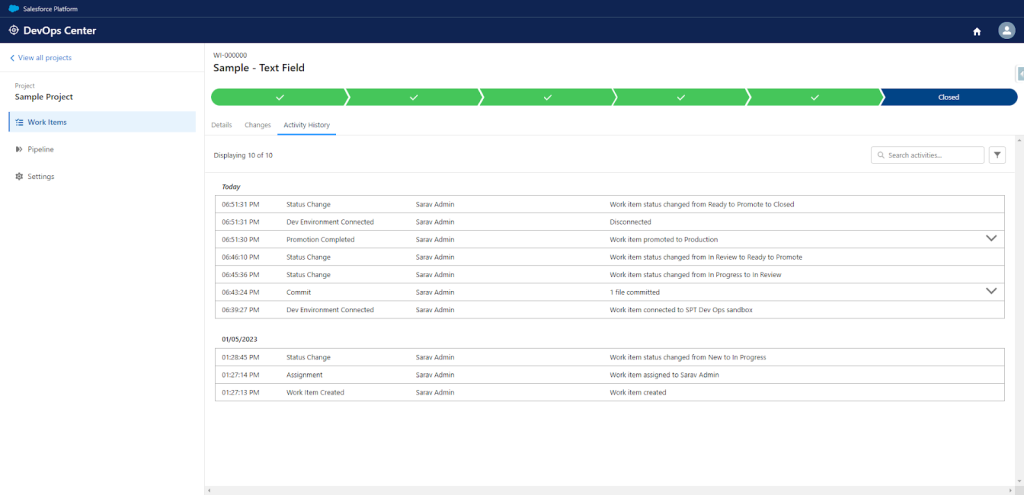
Once the changes are pushed into production we can have a complete overview of the work item by clicking on the work item. Please see the screenshot below,
Conclusion:
In conclusion, embracing DevOps practices within the Salesforce ecosystem is crucial for organizations looking to optimize their software development and deployment processes. DevOps Salesforce offers a comprehensive approach that promotes collaboration, automation, and continuous improvement, enabling teams to deliver high-quality solutions faster and more efficiently.
By implementing DevOps Salesforce, organizations can achieve faster time to market, increased agility, improved software quality, and enhanced customer experiences. The integration of version control systems, automated testing frameworks, and CI/CD pipelines ensures a smooth and reliable process from development to production. Additionally, Salesforce provides tools and APIs that support DevOps practices, enabling organizations to effectively manage complex projects, streamline workflows, and deliver innovative solutions.


