CRMA dashboards are essential tools within CRM platforms designed to provide detailed and interactive visualizations of customer data. These dashboards aggregate, analyze, and display key metrics, enabling businesses to track and manage customer relationships, monitor sales activities, and evaluate overall performance.
Notifications
Setting up notifications within CRMA dashboards allows your team to be instantly alerted to significant changes in data. This real-time alert system ensures that your team can quickly respond to critical events or shifts, making informed decisions that drive business outcomes.
Here’s a step-by-step guide on how to configure and set up notifications in your CRMA dashboard:
Step 1: Define the Conditions for Notifications
The first step in setting up CRMA dashboard notifications is to define the condition that will trigger the alert. This could be any specific change or event in your data that requires attention. Common examples include:
- Opportunity value exceeding a threshold (e.g., opportunity amount > 75k)
- Lead stage change (e.g., lead moves to “Qualified”)
- Customer engagement (e.g., email opens or webinar registrations)
- Case escalation (e.g., support case moved to “Critical”)
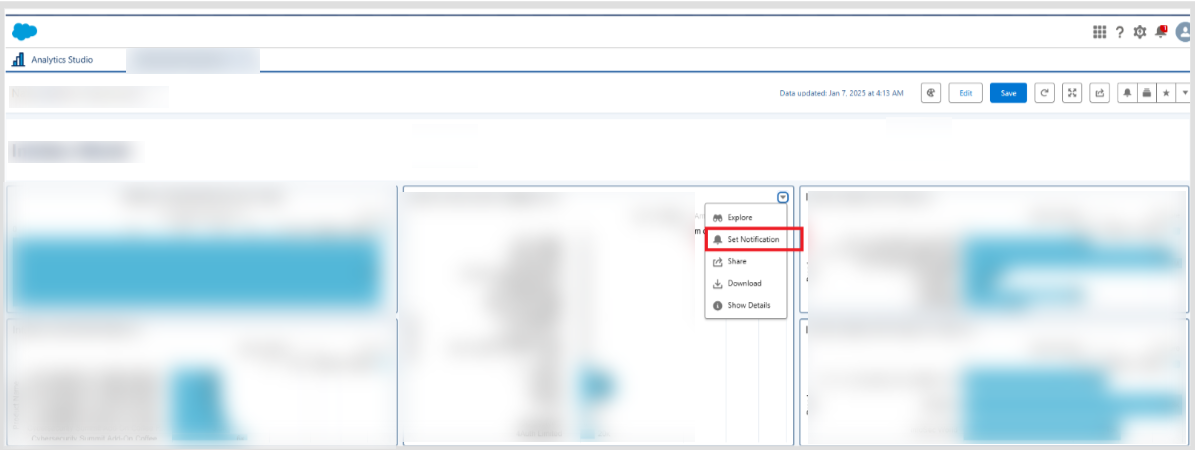
How to Set the Condition:
- Navigate to your CRMA dashboard.
- Select the type of data or metric you want to monitor.
- Set the criteria that will trigger the notification (e.g., a sales opportunity exceeds a specific dollar amount).

Step 2: Select the Notification Recipients
Next, determine who should be notified when the condition is met. This might include specific individuals, roles, or groups within your organization, such as:
- Sales leaders or account managers when an opportunity exceeds a set value.
- Marketing teams when a lead reaches a specific level of engagement.
- Customer support managers when a critical case is logged.
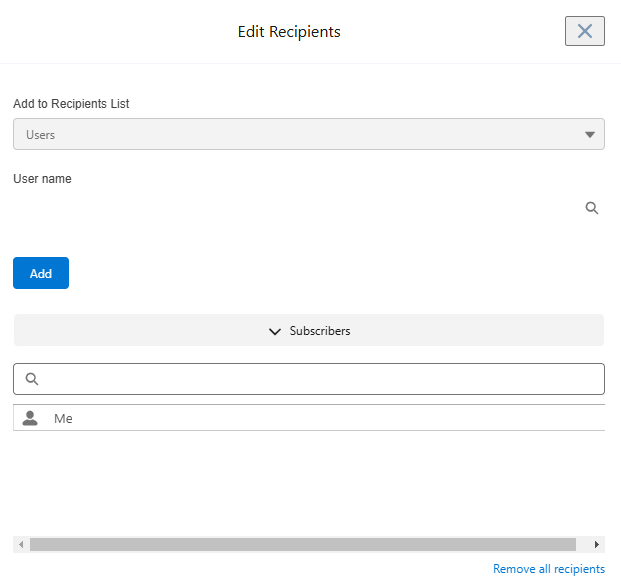
How to Choose Recipients:
• Identify key stakeholders for the specific condition (e.g., sales leadership for opportunity alerts, marketing team for engagement alerts).
• Specify the recipients by selecting users or roles within your CRM system or dashboard settings.
Step 3: Configure the Notification Format and Delivery Method
- Once you have defined the condition and the recipients, the next step is to configure the notification’s format and delivery method. Notifications can typically be delivered through several channels such as:Email, In-app pop-up messages, push notifications (on mobile), SMS (if supported)
How to Configure Delivery:
- Choose the preferred delivery method for each type of notification.
- Specify the message format, including essential details like record names, values, and links to relevant pages (e.g., opportunity ID, lead status).
- Set the frequency of notifications—whether you want them to be sent immediately when triggered or in digest form (e.g., daily or weekly summaries).
Step 4: Set Notification Frequency and Timing
- Notification frequency is an important factor in preventing overload while ensuring that critical events are addressed promptly. You can set up notifications to be sent based on specific schedules or triggered events, such as
- Instant Notifications: Sent immediately when the condition is met.
- Scheduled Summaries: Sent at regular intervals, such as daily or weekly, summarizing all relevant notifications.
How to Set Frequency:
- Determine how often notifications should be sent (e.g., immediately, daily digest).
- Set the specific times or intervals for recurring notifications (e.g., once a day at 9 AM for case escalations).
- Ensure that the frequency aligns with the urgency of the events you are monitoring.
Step 5: Test the Notification Setup
Before finalizing the notification configuration, it’s important to test it to make sure it works as expected. Trigger the condition manually (if possible) or wait for an event to occur naturally and check if the notification is received by the correct recipients.
How to Test:
- Create a test scenario that matches the conditions you’ve set (e.g., create a small opportunity that exceeds the set threshold).
- Confirm that the notification is delivered to the selected recipients in the correct format and with the correct message.
Step 6: Monitor and Adjust Notification Settings
Once your notifications are live, it’s essential to regularly review them to ensure they stay relevant and effective. As your business needs evolve or based on feedback from recipients, you may need to adjust the conditions, recipients, or frequency accordingly.
How to Adjust Notifications:
- Review the performance of notifications regularly by checking activity logs or user feedback.
- Adjust conditions, update recipients, or modify notification frequency as necessary to improve effectiveness.
Best Practices for Setting Up CRMA Dashboard Notifications
- Avoid Overloading Recipients: Too many notifications can lead to alert fatigue. Be selective about which conditions trigger notifications, focusing on the most important events.
- Be Specific with Conditions: Narrow your conditions to focus on significant events (e.g., sales opportunities over $50k) to avoid sending alerts for minor changes.
- Personalize the Message: Make sure the notification message includes key details (e.g., opportunity ID, amount, and the stage) so that recipients can quickly understand the context.
- Integrate Notifications with Workflow: Consider setting up follow-up tasks or automated actions that are triggered by notifications, ensuring a seamless workflow and fast response times.
Conclusion
By setting up CRMA dashboard notifications effectively, you can ensure that your team remains responsive to key changes in real-time, driving more efficient decision-making and helping your business stay agile. Whether you’re tracking high-value opportunities, customer engagement, or support cases, notifications ensure that no important event goes unnoticed. Follow this step-by-step guide to maximize the impact of your CRMA dashboard and keep your team ahead of the curve.