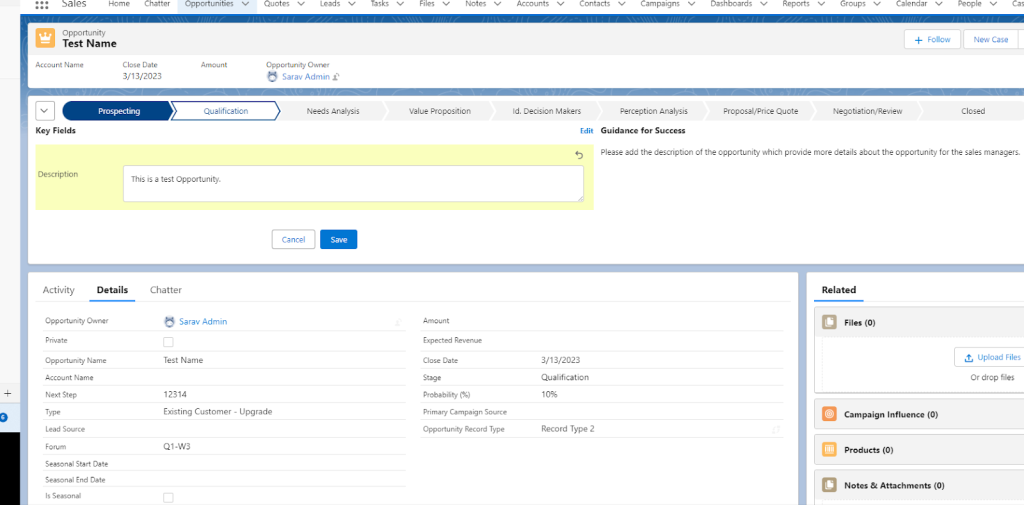
Salesforce Sales Path is a feature of the Salesforce Lightning Experience that provides guidance to sales reps as they work through the sales process. With Sales Path, businesses can create a customized sales process that aligns with their unique sales methodology and provides guidance to their sales reps at every stage of the sales process. In this blog, we will explore the Sales Path feature in Salesforce Lightning Experience and how it can help businesses improve their sales performance.
Sales Path is designed to help sales reps focus on the most important tasks at each stage of the sales process, providing them with clear guidance and helping them to stay on track. With Sales Path, businesses can customize the sales process to match their unique requirements, including adding stages, fields, and guidance messages.
Here are some of the benefits of using Sales Path in Salesforce Lightning Experience:
Improved Sales Performance: Sales Path provides sales reps with guidance on the next best action at each stage of the sales process, helping them to close more deals and improve their sales performance.
Customizable Sales Process: With Sales Path, businesses can customize the sales process to match their unique requirements, including adding stages, fields, and guidance messages.
Increased Visibility: Sales Path provides increased visibility into the sales pipeline, helping businesses to identify bottlenecks and take action to improve the sales process.
Enhanced Collaboration: Sales Path enables sales reps to collaborate more effectively with other team members, including managers and other sales reps, by providing a clear view of the sales process and the next best action.
Here’s how to set up Sales Path in Salesforce Lightning Experience:
Step 1: Define the Sales Process
The first step in setting up a Sales Path is to define the sales process. This involves identifying the stages of the sales process and the key actions that should be taken at each stage. Click on the Setup→ Sales Process to create a sales process.

Step 2: Create Sales Path
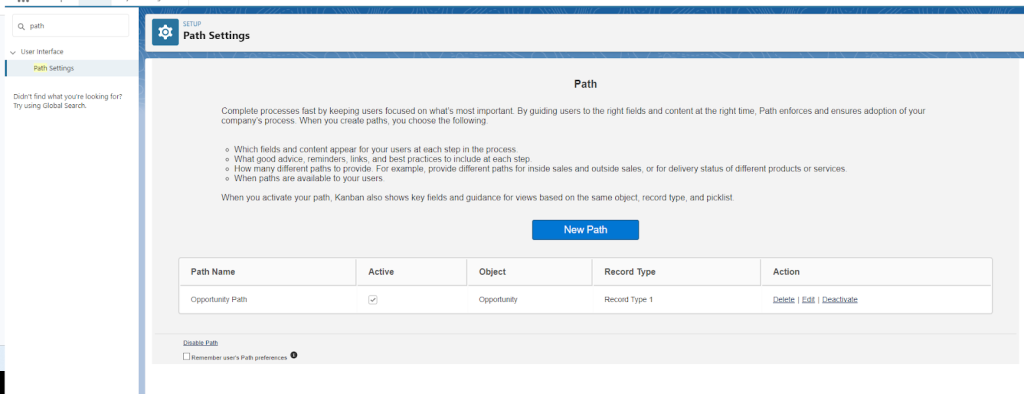
Once the sales process has been defined, you can create a Sales Path in the Salesforce Lightning Experience. This involves adding stages, fields, and guidance messages to the sales process. To create a sales path Click on the Setup→ Path Settings to create a new sales path.
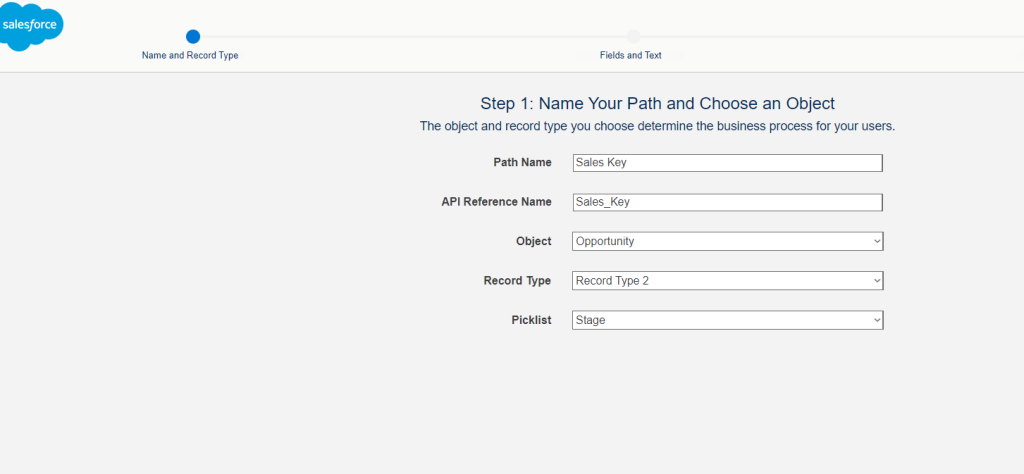
Step 2a : Name Your Path
The next step is to name your path and select which object the path should be visible. Once you have selected the object, picklist and provided the name please click the ‘Next’ button,
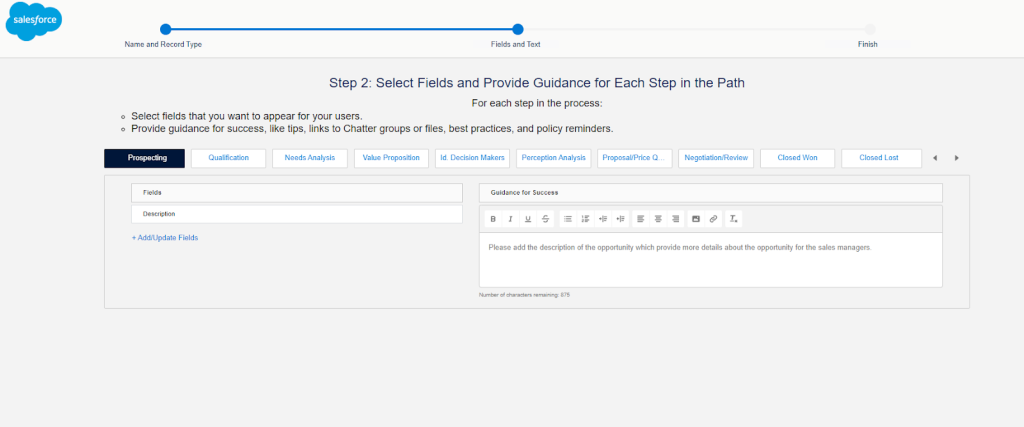
Step 2b: Select Fields and Text
The next step is to select fields that need to be visible on each stage and the guidance text for salespeople to help them key in the successful sale.
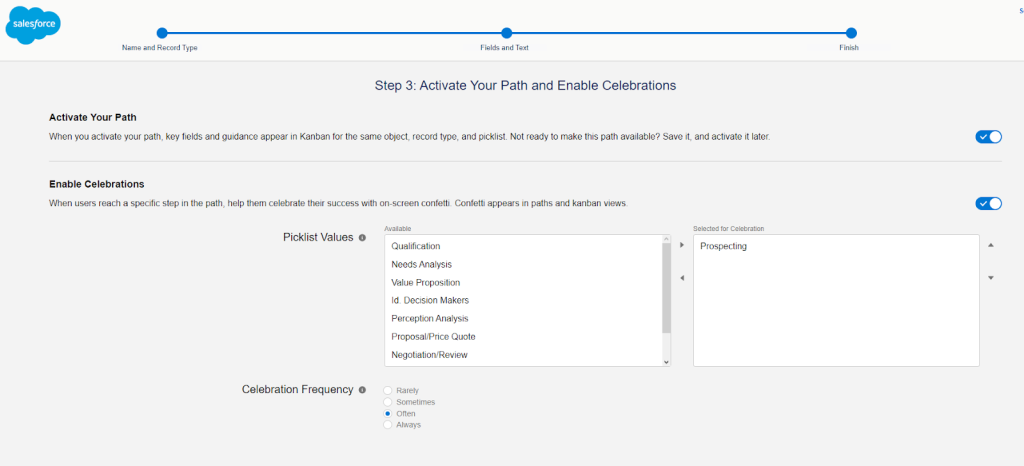
Step 3: Activate Sales Path
The final step is to activate the sales path and encourage the sales users with some celebrations on their successful sale.
Once Sales Path has been created, you can assign it to specific users or groups of users in Salesforce. This ensures that sales reps have access to the guidance and support they need to close deals and improve their sales performance.
Step 4: Monitor and Optimize the Sales Process
Finally, it’s important to monitor and optimize the sales process to ensure that it is delivering the desired results. Use Salesforce reporting and analytics tools to track progress and identify areas for improvement.
Conclusion
Sales Path is a powerful feature of Salesforce Lightning Experience that can help businesses to improve their sales performance. By providing guidance to sales reps at every stage of the sales process, Sales Path can help businesses to close more deals and increase revenue. To set up Sales Path in Salesforce Lightning Experience, define the sales process, create Sales Path, assign it to users, and monitor and optimize the sales process over time. With a Sales Path in place, businesses can improve their sales performance and achieve their revenue goals.


