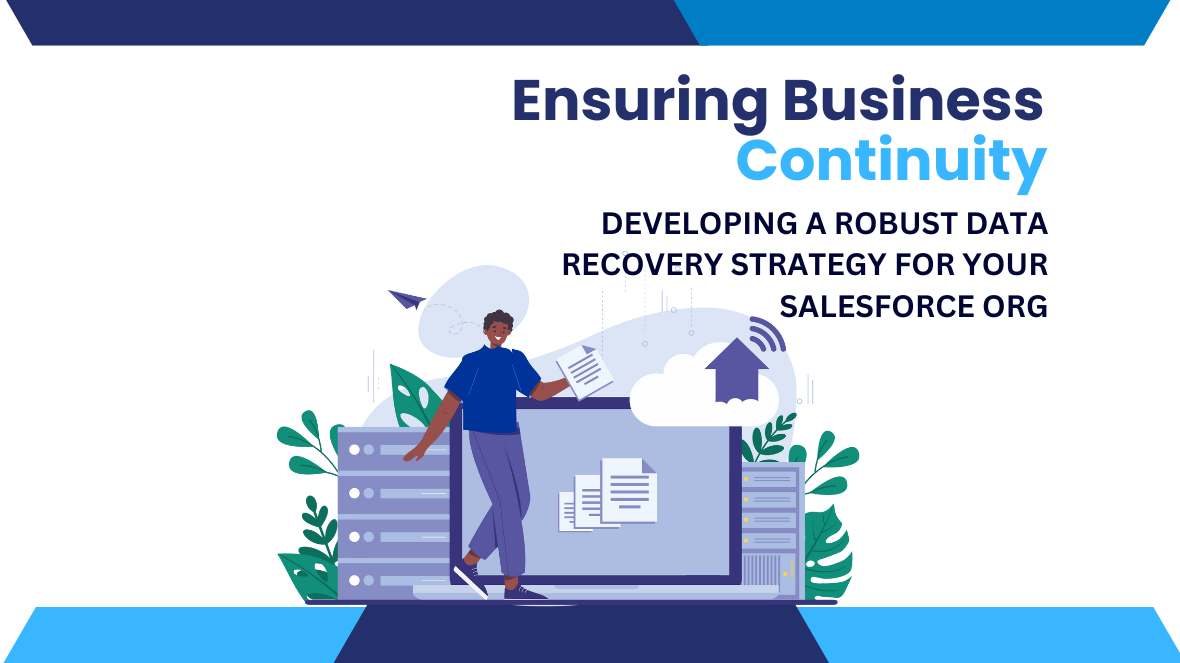
Sweet Potato

Categories
Blog

Mastering Salesforce CPQ Twin Fields: A Comprehensive Guide

In the ever-evolving landscape of Salesforce, the Configure, Price, Quote (CPQ) tool stands out as a robust solution for streamlining the sales process. Among its many features, Twin Fields offer a unique capability that can significantly enhance data management and consistency across your organization. In this blog post, we’ll delve into the intricacies of Salesforce CPQ Twin Fields, explaining what they are, their benefits, and how to effectively implement them in your Salesforce instance.

What are Twin Fields in Salesforce CPQ?

Twin Fields in Salesforce CPQ are pairs of fields that ensure data consistency between related objects. When you create a Twin Field, any change made to the field on one object automatically updates the corresponding field on the related object. This synchronization is crucial for maintaining accurate and up-to-date information across different stages of the sales process.

For example, if you have a “Discount Percentage” field on both the Quote Line Item and the Product objects, Twin Fields can ensure that any changes made to the discount on Product objects are reflected on the other. This synchronization eliminates the need for manual updates and reduces the risk of errors.

Benefits of Using Twin Fields

  1. Data Consistency: Twin Fields ensure that data is always consistent between related objects, which is essential for accurate reporting and decision-making.
  1. Reduced Manual Effort: By automating the synchronization of fields, Twin Fields reduce the need for manual data entry and updates, freeing up your team’s time for more strategic tasks.
  1. Error Reduction: Automated field updates minimize the risk of human error, ensuring that your data remains accurate and reliable.
  1. Improved Efficiency: Streamlined data management processes lead to improved operational efficiency, allowing your sales team to focus on closing deals rather than managing data.

Best Practices for Twin Fields

  1. Identify Essential Fields: Focus on key fields that require synchronization. Common examples include pricing fields, discount rates, and product configurations. Identifying these critical fields will help you prioritize which Twin Fields to create.
  1. Limit the Number of Twin Fields: While Twin Fields are powerful, overusing them can lead to performance issues. Only create Twin Fields for essential data synchronization needs.
  1. Documentation: Keep detailed documentation of all Twin Fields configurations, including the rationale for their creation and any dependencies. This documentation will be invaluable for troubleshooting and future reference.
  1. User Training: Ensure that your sales team is aware of the Twin Fields functionality and understands how it impacts their workflows. Proper training can help them leverage this feature effectively.

Mapping between objects

From ObjectTo Object
ContractOpportunity
Opportunity ProductQuote Line
ProductQuote Line
Product OptionQuote Line
QuoteOrder
Quote LineAsset
Quote LineOpportunity Product
Quote LineSubscription

Use Case

Consider a company that sells complex software solutions with customizable pricing based on the number of users and additional features. In this scenario, the sales team frequently updates the discount percentages based on negotiations with clients. By implementing Twin Fields for the “Discount Percentage” between the Quote Line Item and the Opportunity objects, the company can ensure that any discount changes are reflected across both objects. This synchronization not only saves time but also ensures that the final quote and the opportunity data are always aligned.

Conclusion

Salesforce CPQ Twin Fields are a powerful feature that can significantly enhance data consistency and operational efficiency within your organization. By understanding how to implement and manage Twin Fields effectively, you can streamline your sales processes and ensure that your data remains accurate and up-to-date. Whether you’re just getting started with Salesforce CPQ or looking to optimize your existing setup, Twin Fields offer a valuable tool for achieving your business goals.

Categories
Blog

Unlocking the Power of Salesforce Einstein Copilot: Your Ultimate Guide

In the ever-evolving landscape of customer relationship management (CRM), Salesforce continues to set the bar high with its innovative solutions. One of the latest additions to its robust suite of tools is Salesforce Einstein Copilot, a groundbreaking AI-driven assistant designed to revolutionize how businesses interact with their customers and manage their operations. In this blog post, we will dive deep into what Salesforce Einstein Copilot is, its features, benefits, and how it can transform your business.

What is Salesforce Einstein Copilot?

Salesforce Einstein Copilot is an advanced AI-powered assistant integrated within the Salesforce platform. Leveraging the power of artificial intelligence and machine learning, Einstein Copilot assists users in navigating the CRM, automating tasks, making data-driven decisions, and ultimately enhancing productivity and customer satisfaction.

Key Features of Salesforce Einstein Copilot

  1. Intelligent Recommendations:
    • Einstein Copilot analyzes vast amounts of data to provide users with actionable insights and recommendations. Whether it’s suggesting the next best action for a sales lead or offering personalized product recommendations to customers, this feature ensures that you are always one step ahead.
  2. Natural Language Processing (NLP):
    • With advanced NLP capabilities, Einstein Copilot can understand and respond to natural language queries. Users can interact with the CRM using everyday language, making it more intuitive and user-friendly.
  3. Automation of Routine Tasks:
    • By automating repetitive tasks such as data entry, follow-ups, and scheduling, Einstein Copilot optimizes employee time, enabling them to concentrate on higher-level tasks.
  4. Enhanced Analytics:
    • The AI assistant provides deep insights through predictive analytics, helping businesses anticipate trends, identify opportunities, and mitigate risks before they become issues.
  5. Personalized Customer Interactions:
    • Einstein Copilot helps create highly personalized customer experiences by analyzing customer behavior, preferences, and history. This ensures that every interaction is relevant and tailored to the individual.

Benefits of Using Salesforce Einstein Copilot

  1. Increased Efficiency:
    • By automating routine tasks and providing intelligent recommendations, Einstein Copilot significantly boosts operational efficiency. Employees can accomplish more in less time, leading to improved productivity.
  2. Improved Decision-Making:
    • With data-driven insights and predictive analytics, businesses can make informed decisions quickly and confidently. This reduces the guesswork and enhances strategic planning.
  3. Enhanced Customer Satisfaction:
    • Personalization is key to customer satisfaction. Einstein Copilot ensures that interactions are meaningful and relevant, which leads to higher customer engagement and loyalty.
  4. Cost Savings:
    • Automation and improved efficiency translate to cost savings. Businesses can allocate resources more effectively and reduce the need for manual intervention.
  5. Competitive Advantage:
    • Staying ahead in today’s competitive market requires innovation. Adopting cutting-edge tools like Einstein Copilot positions businesses as forward-thinking and technologically adept.

How to Implement Salesforce Einstein Copilot

  1. Enable Generative AI:
  • Navigate to Setup, locate Generative AI, and enable it via the toggle switch. 

    2. Activate Einstein Copilot:

    • In Setup, search for Einstein Copilots and activate it using the toggle switch.

      3. Assign Permission Sets:

      • Assign pertinent permission sets: Einstein Copilot for Salesforce Admin and Einstein Copilot for Salesforce User.
        Conclusion

        Salesforce Einstein Copilot represents a significant leap forward in the realm of CRM and business automation. By harnessing the power of AI, it empowers businesses to operate more efficiently, make smarter decisions, and deliver exceptional customer experiences. Whether you are a small business or a large enterprise, integrating Einstein Copilot into your Salesforce environment can be a game-changer. Embrace the future of CRM with Salesforce Einstein Copilot and unlock the full potential of your business.

        Ready to take your business to the next level? Explore Salesforce Einstein Copilot today and see the difference it can make!

        Categories
        Blog

        Salesforce Summer ’24 Release: Create Rich Text Headings in Lightning App Builder

        The Salesforce Summer ’24 Release has brought a plethora of exciting features designed to enhance user experience and boost productivity. Among these features is the ability to create rich text headings in Lightning App Builder. This new capability allows users to add stylized and formatted headings, making their Lightning pages more engaging and easier to navigate.

        What is Lightning App Builder?

        Before diving into the new feature, let’s take a quick look at what Lightning App Builder is. Lightning App Builder is a point-and-click tool that allows Salesforce users to create custom pages for the Salesforce mobile app and Lightning Experience. Users can customize the layout and design of their pages, adding various components like lists, charts, forms, and now, rich text headings.

        Introducing Rich Text Headings

        The rich text heading feature allows users to add headings with rich text formatting options to their Lightning pages. This means you can now include bold, italic, underlined text, as well as different font sizes, colors, and even hyperlinks. These headings can help organize and highlight important sections on your pages, making them more visually appealing and user-friendly.

        Key Features of Rich Text Headings

        1. Customizable Formatting: Use various formatting options to make your headings stand out. Apply bold, italic, or underline styles, change font sizes and colors, and add hyperlinks to provide more context or navigate to other pages.

        2. User-Friendly Interface: The rich text editor is intuitive and easy to use, even for those who are not familiar with HTML or CSS. This ensures that any user, regardless of technical expertise, can create visually appealing headings.

        3. Enhanced Navigation: Well-formatted headings help users quickly find the information they need, improving overall navigation and user experience on your Lightning pages.

        How to Use Rich Text Headings in Lightning App Builder

        Using rich text headings in Lightning App Builder is straightforward. Here’s a step-by-step guide:

        1. Open Lightning App Builder:

           – Navigate to the Lightning App Builder from the Salesforce Setup menu.

        2. Select a Page to Edit:

           – Choose an existing Lightning page to edit or create a new one.

        3. Add a Rich Text Component:

           – From the component palette, drag the “Rich Text” component onto your page layout where you want to place the heading.

        4. Edit the Rich Text:

           – Click into the rich text component to open the rich text editor.

           – Enter your heading text and use the formatting options to style it as desired. You can make the text bold, italic, change the font size and color, and add hyperlinks.

        5. Save and Activate:

           – Once you are satisfied with the heading, save your changes.

           – Activate the page so that the new heading is visible to users.

        Example Use Case

        Imagine you are creating a custom sales dashboard in Lightning App Builder. You want to clearly separate different sections of the dashboard such as Sales Performance, Lead Generation, and Opportunities. Using rich text headings, you can create visually distinct headings for each section, making the dashboard more organized and easier to navigate.

        For example:

        Sales Performance: Add a bold, large-font heading in a striking color to highlight this crucial section.

        Lead Generation: Use italics and a different color to differentiate this section from others.

        Opportunities: Include a hyperlink in the heading to navigate to a detailed opportunities report.

        Benefits of Rich Text Headings

        1. Improved Readability: Well-formatted headings break up the text and make it easier for users to scan and find relevant information quickly.

        2. Enhanced Visual Appeal: Stylish headings contribute to a more professional and polished look for your Lightning pages.

        3. Better User Experience: Clear and distinct headings improve overall navigation and usability, helping users accomplish their tasks more efficiently.

        Conclusion

        The ability to create rich text headings in Lightning App Builder is a powerful enhancement in the Salesforce Summer ’24 Release. It empowers users to create more organized, visually appealing, and user-friendly Lightning pages. Whether you are a Salesforce admin, developer, or business user, this new feature will undoubtedly help you build better experiences for your Salesforce users.

        Explore the rich text heading feature today and start transforming your Lightning pages with engaging and informative headings.

        Categories
        Blog

        Embrace Personal Labels: Your New Organizational Tool in Salesforce Summer ’24

        The latest Salesforce Summer ’24 update introduces an exciting feature called Personal Labels. Imagine them as vibrant sticky notes for your records, enhancing your ability to organize your data uniquely and efficiently. Here’s why Personal Labels are about to become your favorite Salesforce tool.

        Discovering the Magic of Personal Labels

        Personal Labels are like magic markers in Salesforce. They let you tag records with your own special labels. No more digging through folders or getting lost in a sea of data. With Personal Labels, you’re the boss of how things are organized.

        The Benefits of Personal Labels

        Customized Organization: Personal Labels enable you to organize records according to your personal preferences. Whether you need to sort leads by urgency, projects by phase, or deals by region, you can create labels that align with your workflow.

        Quick Retrieval: Finding records becomes a breeze. Just type in the relevant label in the search bar, and watch as all the associated records appear instantly.

        Increased Efficiency: With everything neatly labeled, you can devote more time to essential tasks like closing deals and delighting customers, rather than spending time searching for information.

        Getting Started with Personal Labels

        Simple Label Creation

        1. Craft Your Labels: Navigate to any record and find the “Labels” section. Add a new label with a name that fits your needs, giving your record a personalized identifier.

        Assign Your Labels: Tagging records is straightforward. Open a record, go to the “Labels” section, and select the appropriate labels. It’s as simple as categorizing your belongings.

        Efficient Record Retrieval

        Use the search bar in Salesforce to locate records based on your labels. Type the label name, press enter, and your tagged records will be at your fingertips.

        If you want to know more, please refer to this article : Find Records Easily with Personal Labels

        Expert Tips for Effective Labeling

        1. Keep It Intuitive: Choose naming conventions that are easy to remember. Simplicity is key.
        2. Regular Maintenance: Periodically review your labels to ensure they are still relevant. Remove obsolete labels and keep your system tidy.
        3. Team Sharing: While Personal Labels are for individual use, sharing your labeling strategies with your team can promote a cohesive and efficient work environment.

        Limitation

        You can add labels to records on these objects.

        • Account
        • Cadence
        • Cadence Step Tracker
        • Call Script
        • Campaign
        • Contact
        • Case
        • Email Template
        • Lead
        • Opportunity
        • Orchestration Work Item
        • Task

        Conclusion

        Personal Labels in Salesforce Summer ’24 revolutionize how you organize and retrieve your records. Give them a try and experience the enhanced efficiency and ease of use they bring to your Salesforce experience. Organize smarter, work faster, and keep your sanity intact with Personal Labels!

        Categories
        Blog

        Empowering Educational Excellence with Salesforce Education Cloud

        In today’s rapidly evolving educational landscape, institutions face the challenge of meeting diverse needs while striving for excellence. Salesforce Education Cloud emerges as a transformative solution, revolutionizing how educational institutions operate and engage with their stakeholders. Let’s delve into its myriad benefits for students, faculty, administrators, and alumni.

        For Students: Personalized Learning Journeys

        Centralized Access: Students gain access to a personalized portal, consolidating academic progress, schedules, and event updates in one convenient platform.

        Enhanced Support: Tailored advising and mentorship programs offer proactive assistance, guiding students through their academic journey and addressing individual needs.

        Community Building: Online platforms facilitate connections among students, enabling collaboration, study groups, and active participation in campus activities, fostering a sense of belonging.

        For Faculty: Streamlined Operations and Enhanced Engagement

        Efficient Course Management: Simplified tools for course scheduling, assignment management, and grading streamline administrative tasks, allowing faculty to focus more on teaching and student engagement.

        Improved Communication: Collaboration platforms facilitate seamless interaction between faculty and students, enabling personalized feedback, announcements, and discussions to enhance the learning experience.

        Data-Driven Insights: Analytics provide valuable insights into student performance and engagement, empowering faculty to adapt teaching strategies and interventions for improved outcomes.

        For Administrators: Optimized Efficiency and Informed Decision-Making

        Centralized Data Management: Unified platforms for admissions, enrollment, and analytics provide administrators with a comprehensive view of institutional data, enabling informed decision-making and strategic planning.

        Streamlined Processes: Automation of routine administrative tasks, such as admissions processes and resource allocation, reduces manual workload and increases operational efficiency.

        Resource Optimization: Tools for budgeting, facilities management, and workflow optimization help administrators allocate resources effectively, maximizing institutional efficiency and effectiveness.

        For Alumni and Donors: Strengthening Connections and Support

        Engaging Alumni: Online communities and personalized engagement initiatives foster connections between alumni and their alma mater, providing opportunities for networking, mentorship, and ongoing involvement.

        Effective Fundraising: Donor management tools streamline fundraising efforts by providing insights into donor preferences, tracking contributions, and optimizing fundraising campaigns for maximum impact.

        Continuous Involvement: Volunteer opportunities, event management platforms, and alumni engagement initiatives ensure that alumni remain actively involved in supporting the institution’s mission and initiatives.

        How to Sign Up for a Salesforce Education Cloud Trial Version

        If you’re interested in exploring the benefits of Salesforce Education Cloud for your institution, signing up for a trial version is a great way to start. Here are the steps to guide you through the process:

        Step 1:  Visit the Salesforce Education Cloud Website

        Step 2:  Fill Out the Registration Form

        • Ensure all information is accurate to avoid any delays in the trial setup.

        Step 3:  Submit the Form

        Step 4:  Verify Your Email

        Step 5:  Access Your Trial Account and Explore the Features

        Conclusion

        Salesforce Education Cloud is a game-changer for educational institutions, empowering them to deliver personalized, connected, and efficient experiences for students, faculty, administrators, and alumni alike. By leveraging the power of Salesforce’s innovative technologies, institutions can enhance operational efficiency, improve student outcomes, and foster lifelong connections within their educational communities. Embracing Salesforce Education Cloud is not just an investment in technology but a commitment to transforming education and empowering individuals to achieve their full potential.

        Categories
        Blog

        Retiring Salesforce for Outlook – What You Need to Understand and How to Discover Alternatives

        Salesforce for Outlook, an integration tool developed by Salesforce, synchronizes emails, contacts, tasks, and events between Salesforce and Microsoft Outlook. This integration allows users to seamlessly view Salesforce data within Outlook and vice versa, simplifying customer information management and activity tracking directly from their email client. Inbox extensions, particularly useful for sales professionals, facilitate smooth integration between their email provider and Salesforce, enhancing workflow efficiency and productivity.

        However, Salesforce is sunsetting Salesforce for Outlook, gradually diminishing its support and features. This change may hinder your team’s ability to effectively manage and close deals. While Salesforce is offering alternative solutions, they come with their own trade-offs and feature sets. Fortunately, the AppExchange offers numerous solutions with comparable or advanced functionality to Salesforce for Outlook.

        Evaluating Salesforce for Outlook Alternatives

        Transitioning to a new tool presents an opportunity to optimize and improve your processes. However, with numerous alternatives available, each offering unique features and capabilities, selecting the best fit for your company can be challenging.

        To guide you through this evaluation process, we’ve outlined the following steps:

        1. Assess Your Team’s Needs: Dive into how your team currently utilizes Salesforce for Outlook. For instance, if your sales team heavily relies on email tracking to prioritize leads, ensure the alternative you choose offers robust email tracking features to maintain this workflow.
        2. Evaluate Integration Compatibility: Verify that any alternative seamlessly integrates with your existing Salesforce environment. For example, if your team uses custom objects extensively, ensure the alternative supports seamless integration with these custom objects.
        3. Consider Customization Capabilities: Examine the level of customization offered by each alternative to tailor the user experience. For instance, if your team requires specific fields to be displayed prominently in the interface for quick access, ensure the alternative allows for such customization.
        4. Analyze User Adoption Potential: Prioritize user interface intuitiveness and minimal training requirements. For example, if your team consists of members with varying levels of technical expertise, opt for an alternative with a user-friendly interface and intuitive navigation to facilitate smoother adoption.
        5. Understand Data Storage and Reporting Limitations: Evaluate how each alternative stores and utilizes captured data within Salesforce. For instance, if your team heavily relies on historical data for forecasting and trend analysis, ensure the alternative stores captured data indefinitely and allows for easy access within Salesforce reports and dashboards.
        6. Explore Advanced Features: Look for advanced features that could provide your sales team with a competitive edge. For example, if your team focuses on relationship-building, consider alternatives that offer relationship intelligence and insights to help strengthen client connections.
        7. Review Data Security and Compliance Measures: Ensure that any alternative adheres to data protection regulations and employs robust security measures. For example, if your company operates in a highly regulated industry such as healthcare or finance, prioritize alternatives with stringent data security and compliance measures in place.
        8. Consider Implementation and Ongoing Support: Assess the level of assistance provided during implementation and ongoing support services. For instance, if your team requires assistance with data migration and customization during implementation, choose an alternative with comprehensive implementation support. Additionally, prioritize vendors with responsive customer support to address any issues or queries promptly.
        9. Schedule a Personalized Demo: Request a demo with your preferred alternative to see it in action. For example, schedule a personalized demo with the vendor to explore how the alternative aligns with your company’s specific needs and preferences, and to evaluate its functionality in a real-world scenario.
        Categories
        Blog

        New User Management Features in Salesforce Summer ’24 Release

        In this article, we’ll discuss the importance of user management processes, highlight the built-in functionalities you can utilize, and explain how recent enhancements can improve workflow efficiency for all users.

        1. General Availability of User Access Policies

        User access policies have transitioned from beta to general availability, offering a powerful tool for automating user permissions and memberships. Admins can now automatically assign or remove permission sets, permission set groups, queue or group memberships, and various licenses based on specific user criteria. This can be done as a one-time action or set as an ongoing automation triggered by user creation or updates.

        The Summer ’24 release significantly increases the number of active policies from 20 to 200, accommodating a wide range of organizational scenarios. Additionally, admins can now set the order of policies, providing more control and ensuring efficient orchestration. The access changes tab allows for easy auditing of changes made by these policies.

        2.User and Public Group View Summaries

        Responding to feedback from the Trailblazer Community, Salesforce introduces the View Summary button for user records, simplifying the process of checking user access. This feature consolidates object and field permissions, user permissions, public group memberships, queue memberships, and custom permissions into one accessible view.

        A similar summary view is now available for public groups, displaying where each group is used within your org, including sharing rules, list views, report, and dashboard folders. This enhancement significantly reduces the time and effort required to manage user and group permissions.

        3. Permission Set and Group View Summaries

        The View Summary feature has now been expanded to include permission sets and permission set groups, improving user experience and navigation efficiency. Previously available in beta, this feature is now generally available in production orgs. It allows admins to swiftly access comprehensive details such as related permission set groups, object and field permissions, user permissions, and custom permissions.

        By consolidating all this information onto a single page, managing permission sets and groups becomes significantly easier and faster, eliminating the need to navigate through multiple sections.

        4. New Permissions for User Management

        To improve security and limit extensive permissions for non-admin users, Salesforce introduces two new user-specific permissions: Freeze Users and Monitor Login History. Previously, these actions required the Manage Users permission. With the Summer ’24 release, these capabilities are now separate, allowing for more granular control.

        These new permissions are accessible in the System Permissions section of your permission sets, providing flexibility in user management without compromising security.

        5. Dev Sandbox Management Permissions

        The Summer ’24 release introduces a new permission specifically for managing Developer and Developer Pro sandboxes. The Manage Dev Sandboxes permission restricts sandbox manipulation capabilities, ensuring that full and partial copy sandboxes remain under the control of a limited number of admins. The traditional Manage Sandboxes permission will still be available but should be reserved for more extensive sandbox management tasks.

        Conclusion

        The Summer ’24 Salesforce release significantly enhances user management capabilities, providing admins with more control, efficiency, and security.

        Categories
        Blog

        Unmasking Multi-Select Picklist Constraints

        In the Salesforce ecosystem, there’s an ongoing debate about using multi-select picklists in implementations. For new and experienced admins alike, it’s crucial to understand the limitations and weigh the pros and cons before deciding.

        1. Reporting of Multi-Select Picklist Field

        One of the primary concerns with multi-select picklists is their impact on reporting. When data is displayed in the UI, values are separated by semicolons, and this same format is used in reports. This means that only identical field values are grouped together, considering the entire string including separators. As a result, grouping by a multi-select picklist can be confusing since each unique combination is treated as a separate value. For instance, different accounts with overlapping values will appear as separate groups if their exact combinations differ.

        To address this, filters are often more practical. Available options include “includes,” “excludes,” “equals,” and “not equal to.” Using multiple filters and filter logic can refine results, but this requires precise knowledge of the exact values needed, as multi-select picklist filters require free text entry.

        2. Field History Tracking of Multi-Select Picklist Field

        Another challenge is with field history tracking. Salesforce allows tracking for up to 20 fields per object, which is already limited for complex objects. While you can enable history tracking for multi-select picklists and see who changed the value and when, the Old Value and New Value fields remain blank. This limitation can be significant if tracking changes to multi-select picklists is critical. Consider upvoting related Salesforce ideas to prioritize this enhancement.

        3. Data Import of Multi-Select Picklist Field

        Updating records via data imports is common for Salesforce Admins, and multi-select picklists complicate this process. When updating these fields, it’s crucial to verify existing values to prevent data loss. If an existing value needs to be retained while adding a new one, the new value must be formatted correctly using semicolons. For example, if a field already contains “Value 5” and “Value 2” needs to be added, the correct entry should be “Value 5;Value 2.” Incorrect formatting can overwrite existing values.

        4. Formulas and Validations of Multi-Select Picklist Field

        Using multi-select picklists in formulas and validations can be tricky. Although they can be incorporated, many functions are incompatible with this field type. The INCLUDES() function is essential for checking if a multi-select picklist contains a specific value, similar to ISPICKVAL() for standard picklists. However, multi-select picklists currently do not work with the TEXT() function, which would simplify many use cases. Workarounds like using IF() functions or Flow Text Template resources are necessary, but advocating for this functionality through Salesforce ideas is recommended.

        5. Automation of Multi-Select Picklist Field

        Multi-select picklists pose challenges in automation, whether using Apex or Salesforce Flows. Values must be parsed based on the semicolon separator. In Flows, the operators available are different from those in Reports. While Reports offer “includes” and “excludes” filters, Flows only provides “Contains,” requiring conditional logic for “does not contain” scenarios.

        Summary

        Working with multi-select picklists in Salesforce can be complex and may hinder long-term implementation success due to these limitations. Although they may be useful in certain cases, your organization’s evolving needs might eventually necessitate a custom object alternative. 

        Have you ever faced any of these or other challenges while working with multi-select picklists in Salesforce? How did you overcome them? Share your experiences in the comments below!

        Categories
        Blog

        Exploring the Salesforce Automation App

        Introduction

        In the ever-evolving landscape of customer relationship management, Salesforce stands out as a beacon of innovation. With every seasonal release, Salesforce brings forward enhancements that drive businesses toward increased efficiency and success. In the upcoming Summer ’24 update, Salesforce introduces an eagerly awaited automation app, offering users a comprehensive view of their flows centrally in one place. In this blog, we’ll delve into the functionalities of this new app and the key features

        Key Features of the Automation Lightning App

        The Automation Lightning App provides a centralized hub for managing all your flows. This centralized approach simplifies administration and reduces errors by allowing you to create, edit, and monitor flows from a single location. The app’s dashboard gives a clear overview of active, paused, and failed flows, helping you quickly identify and address issues.

        This is how it looks like in Salesforce:

        How to enable the automation app

        1. Click Setup→Process Automation Settings.
        2. Select the ‘Enable the Automation Lightning App’ and click ‘Save’

        Conclusion

        As you explore the possibilities offered by the Automation Lightning App, By consolidating flow management into a single hub, it streamlines processes, enhances productivity, and provides greater control over automated workflows, making it an invaluable tool for optimizing your Salesforce operations.

        Categories
        Blog

        Boosting Efficiency: How Salesforce Summer ’24 Enhances Productivity with More Actions in Intelligence Views

        Introduction:

        In the dynamic corporate environment, operational efficiency plays a pivotal role. With Salesforce Summer ’24, users are equipped with an array of powerful features designed to streamline workflows and save valuable time. One such enhancement is the introduction of More Actions in the Intelligence Views section, offering users a convenient way to access additional actions directly within their intelligence views.

        Enhanced Intelligence Views:

        Intelligence Views provide users with valuable insights and actionable data right at their fingertips. With the Summer ’24 release, Salesforce has expanded the functionality of Intelligence Views by introducing More Actions, empowering users to take swift action without navigating away from their current view.

        Time-Saving Actions:

        The new More Actions feature offers a range of time-saving actions that users can perform directly within their Intelligence Views. Whether it’s creating tasks, sending emails, or updating records, users can now complete these actions with just a few clicks, eliminating the need to switch between multiple screens or applications.

        Seamless Integration:

        What sets More Actions apart is its seamless integration with existing Salesforce functionality. Users can leverage the power of Salesforce automation tools, such as Process Builder and Flows, to create custom actions tailored to their specific business needs. This seamless integration enables users to enhance productivity without compromising on functionality.

        Personalization Features:

        Salesforce Summer ’24 empowers users with advanced customization options. Administrators have the ability to create custom actions that are specifically designed to meet the unique requirements of their organization. From simple data updates to complex workflow automation, the possibilities are endless, allowing organizations to tailor their Salesforce experience to match their workflow.

        Benefits for Users:

        The introduction of More Actions in Intelligence Views brings several benefits to Salesforce users:

        1. Boosted Productivity: Users can complete tasks more efficiently without leaving their current view.
        2. Enhanced User Experience: Streamlined workflows and intuitive interface design improve overall user satisfaction.
        3. superior resilience: Salesforce’s flexibility enables organizations to customize the platform to align with their unique business workflows, bolstering their resilience.
        4. Improved Decision-Making: Access to actionable insights directly within Intelligence Views enables faster, data-driven decision-making.

        Conclusion:

        Salesforce Summer ’24 continues to innovate and empower users with features designed to enhance productivity and drive success. With More Actions in Intelligence Views, users can harness the full potential of Salesforce to streamline workflows, save time, and make informed decisions. As organizations strive to stay ahead in today’s competitive landscape, Salesforce remains a trusted partner in driving efficiency and achieving business objectives.